Concept
MCP Endpoints are the entry points that AI clients (like Claude, ChatGPT, or custom agents) use to access your configured MCP Servers. Instead of connecting AI clients directly to individual MCP servers, you connect them to an Infisical MCP Endpoint which acts as a secure gateway. This architecture provides several benefits:Federation
Combine tools from multiple MCP servers behind a single endpoint.
Tool Selection
Control exactly which tools are available through each endpoint.
Access Control
Manage who can use each endpoint.
Centralized Logging
All tool invocations are logged regardless of which MCP server they target.
PII Filtering
Automatically redact sensitive data from requests and responses.
Auth Delegation
Handle OAuth and token-based authentication for connected servers.
How It Works
When you create an MCP endpoint, Infisical generates a unique URL that you can add to your AI client’s MCP configuration. The AI client connects to this URL and can access all enabled tools from the connected MCP servers.Guide to Creating an MCP Endpoint
In the following steps, we explore how to create an MCP endpoint and connect it to an AI client.- Infisical UI
Navigate to MCP Endpoints
Head to your Agent Sentinel project and select MCP Endpoints from the sidebar, then click Create Endpoint.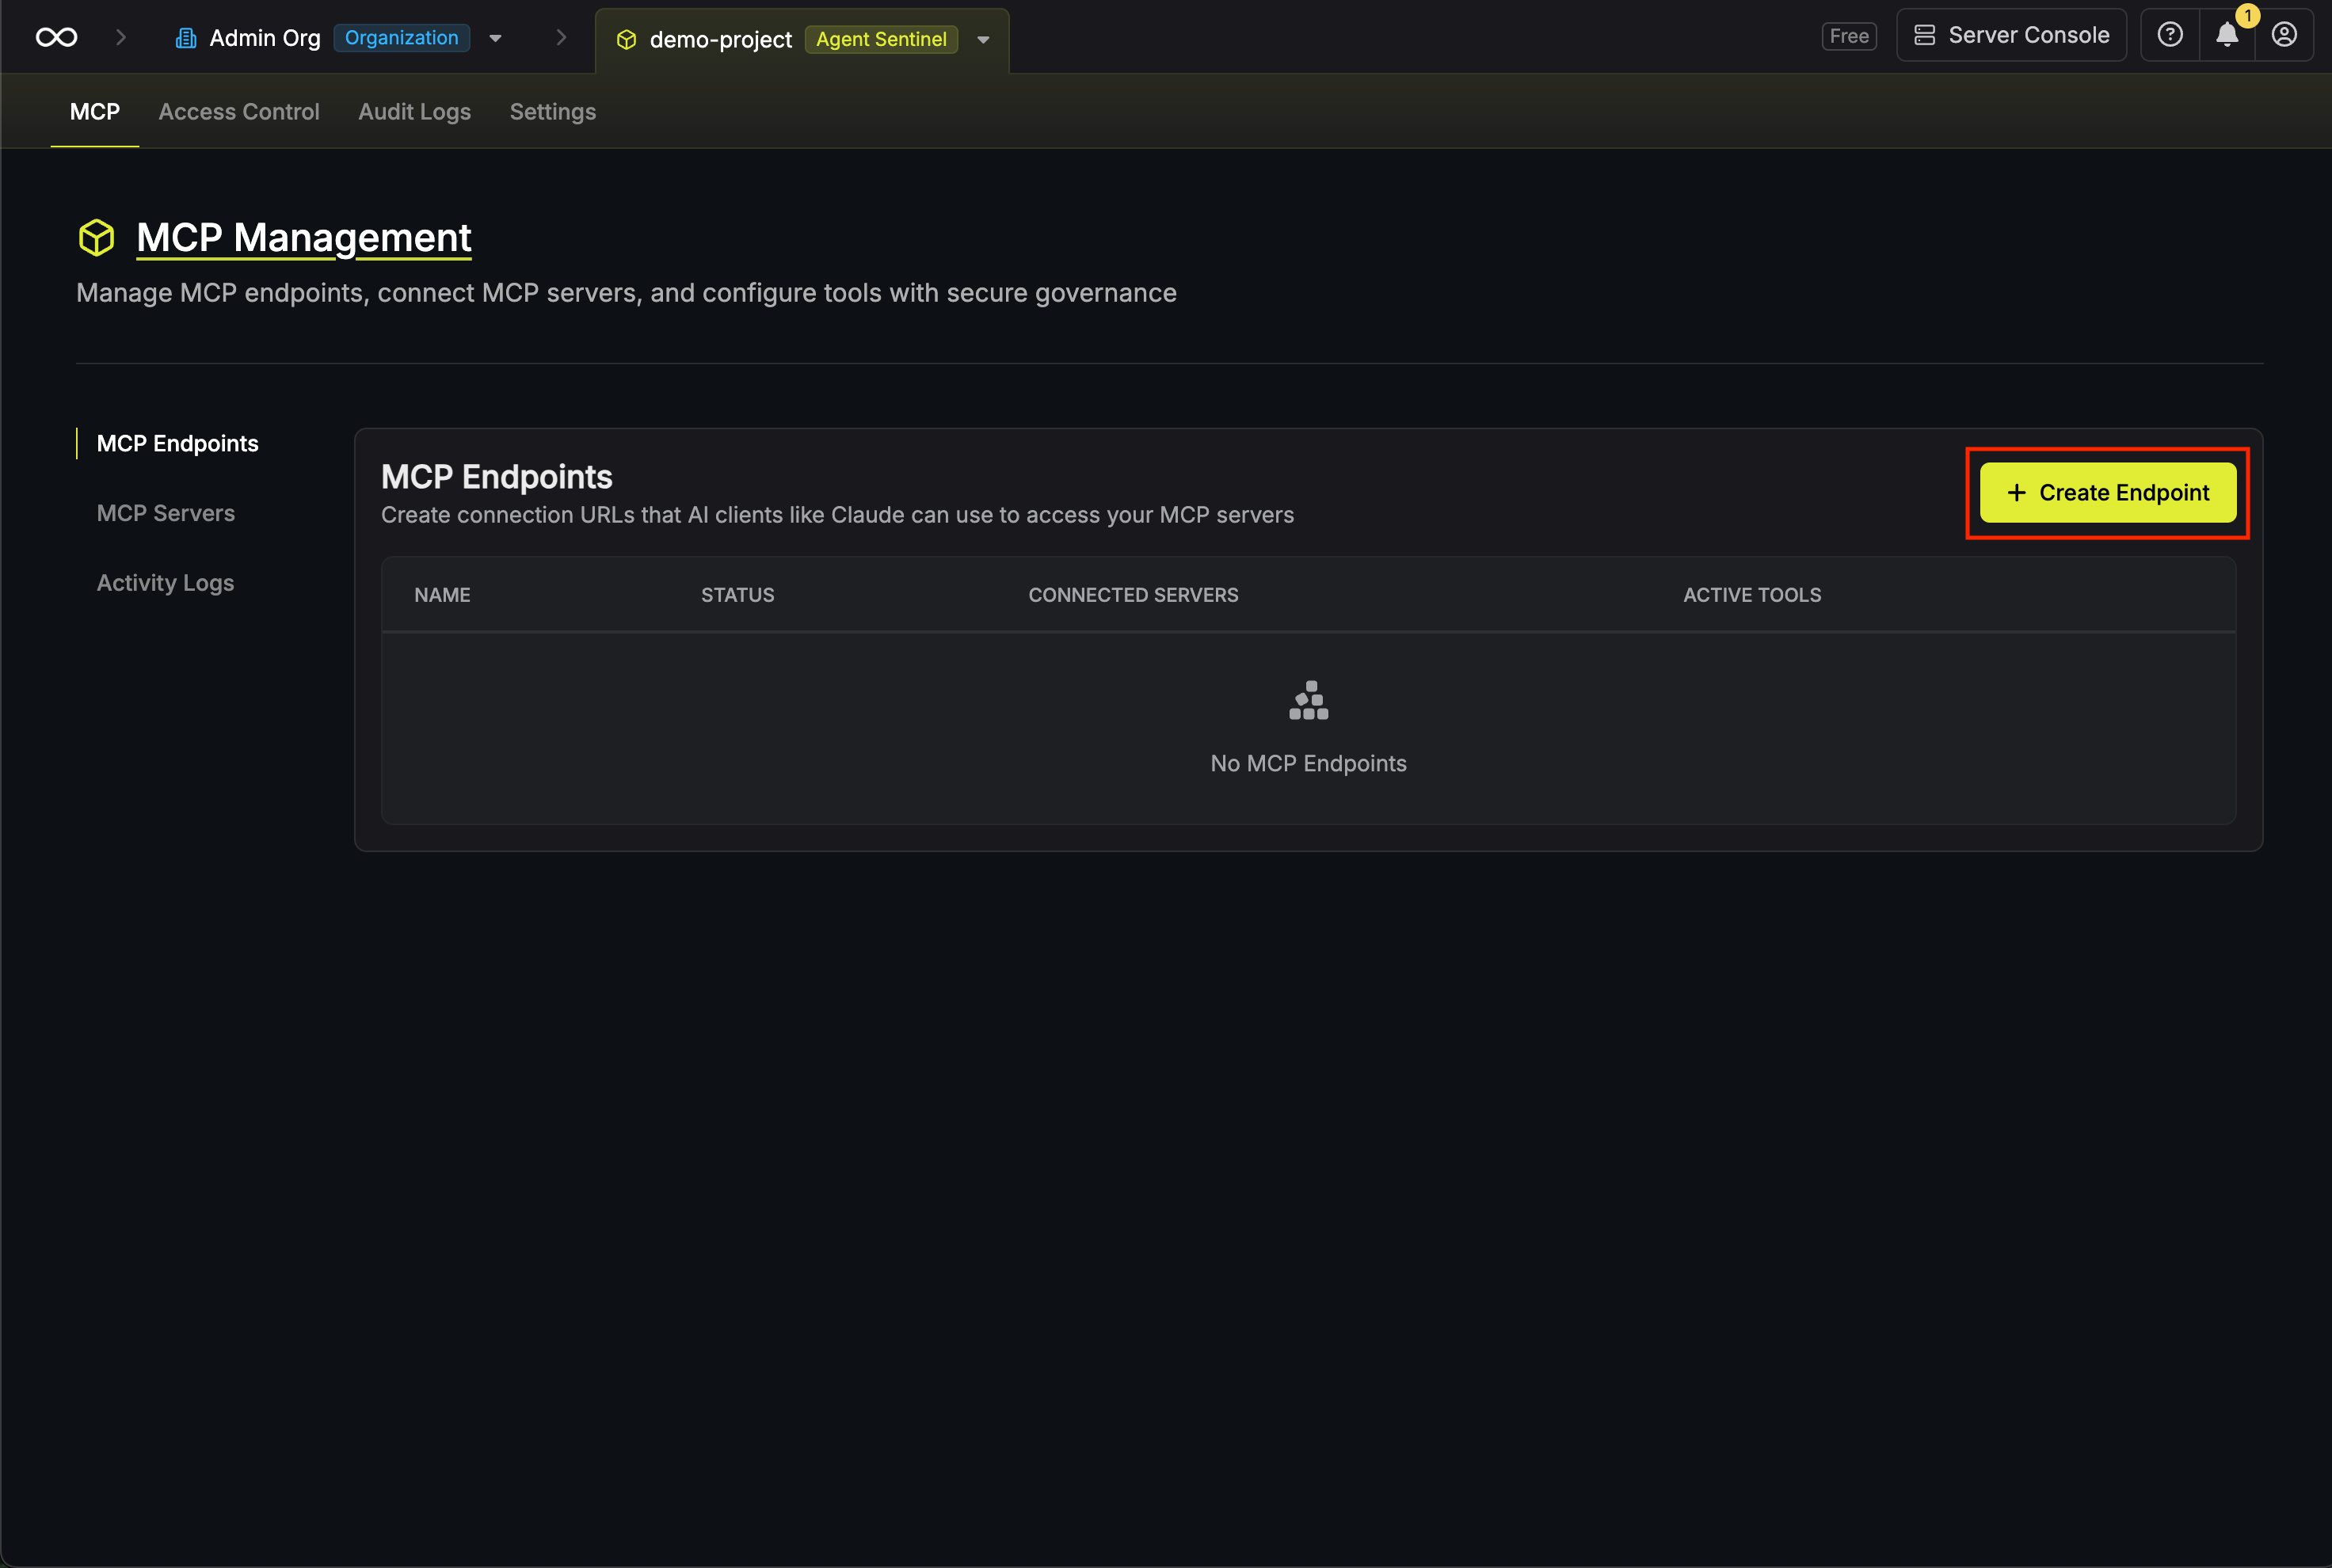
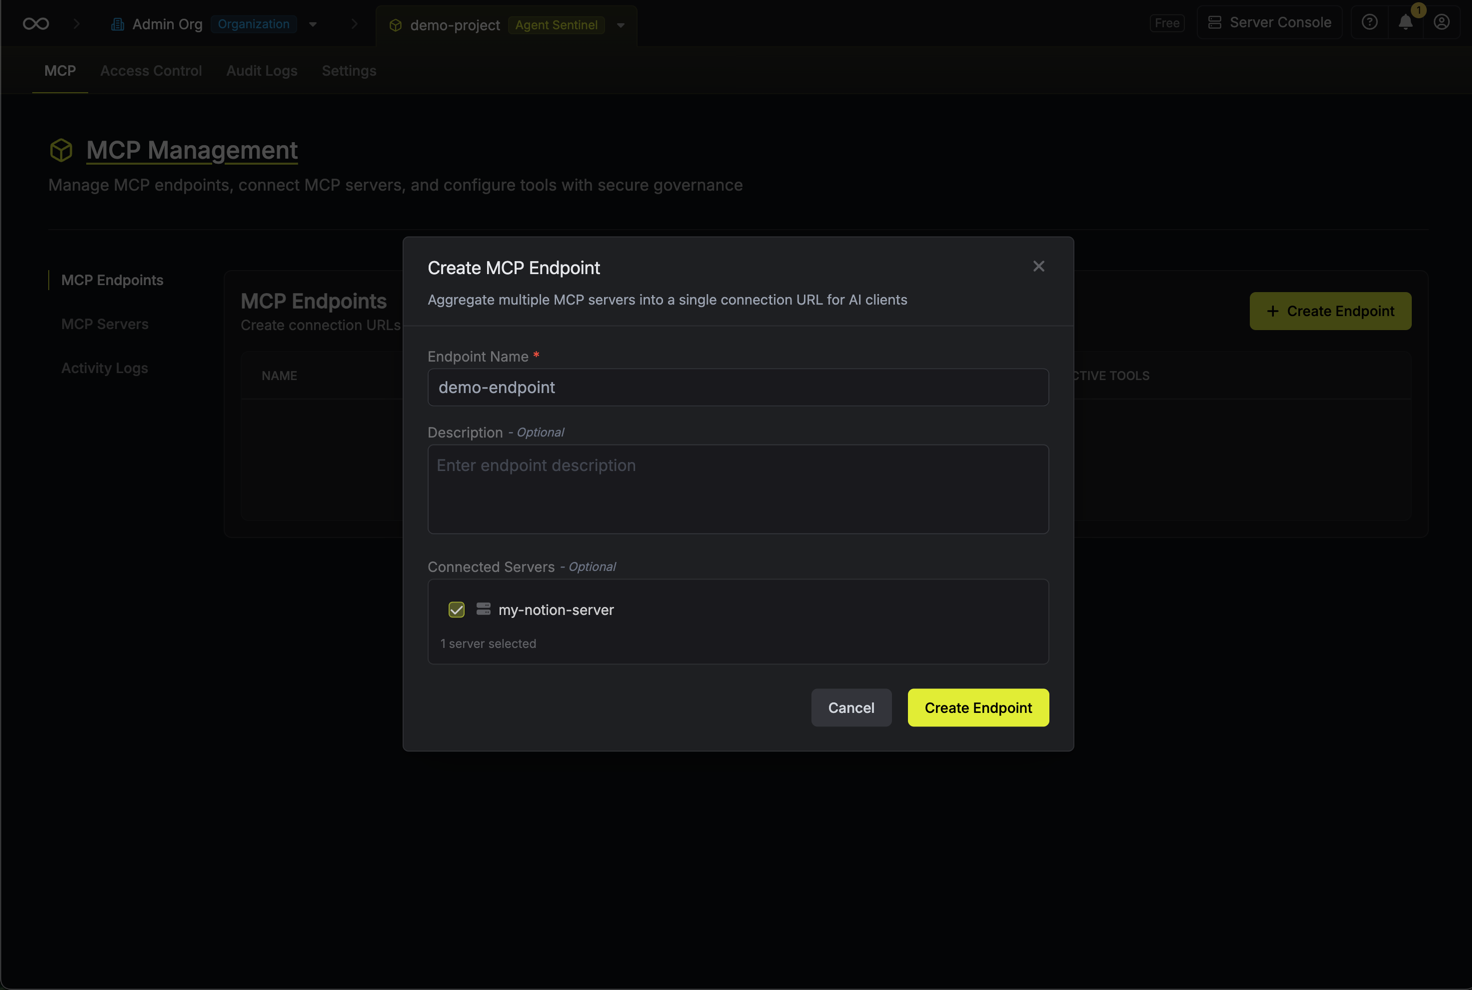
Configure endpoint details
Enter the following details for your endpoint:
- Name: A friendly name to identify this endpoint (e.g., “Engineering Team Endpoint”)
- Description (Optional): A description of the endpoint’s purpose
-
Connected Servers: A selection of the MCP servers to make available through this endpoint
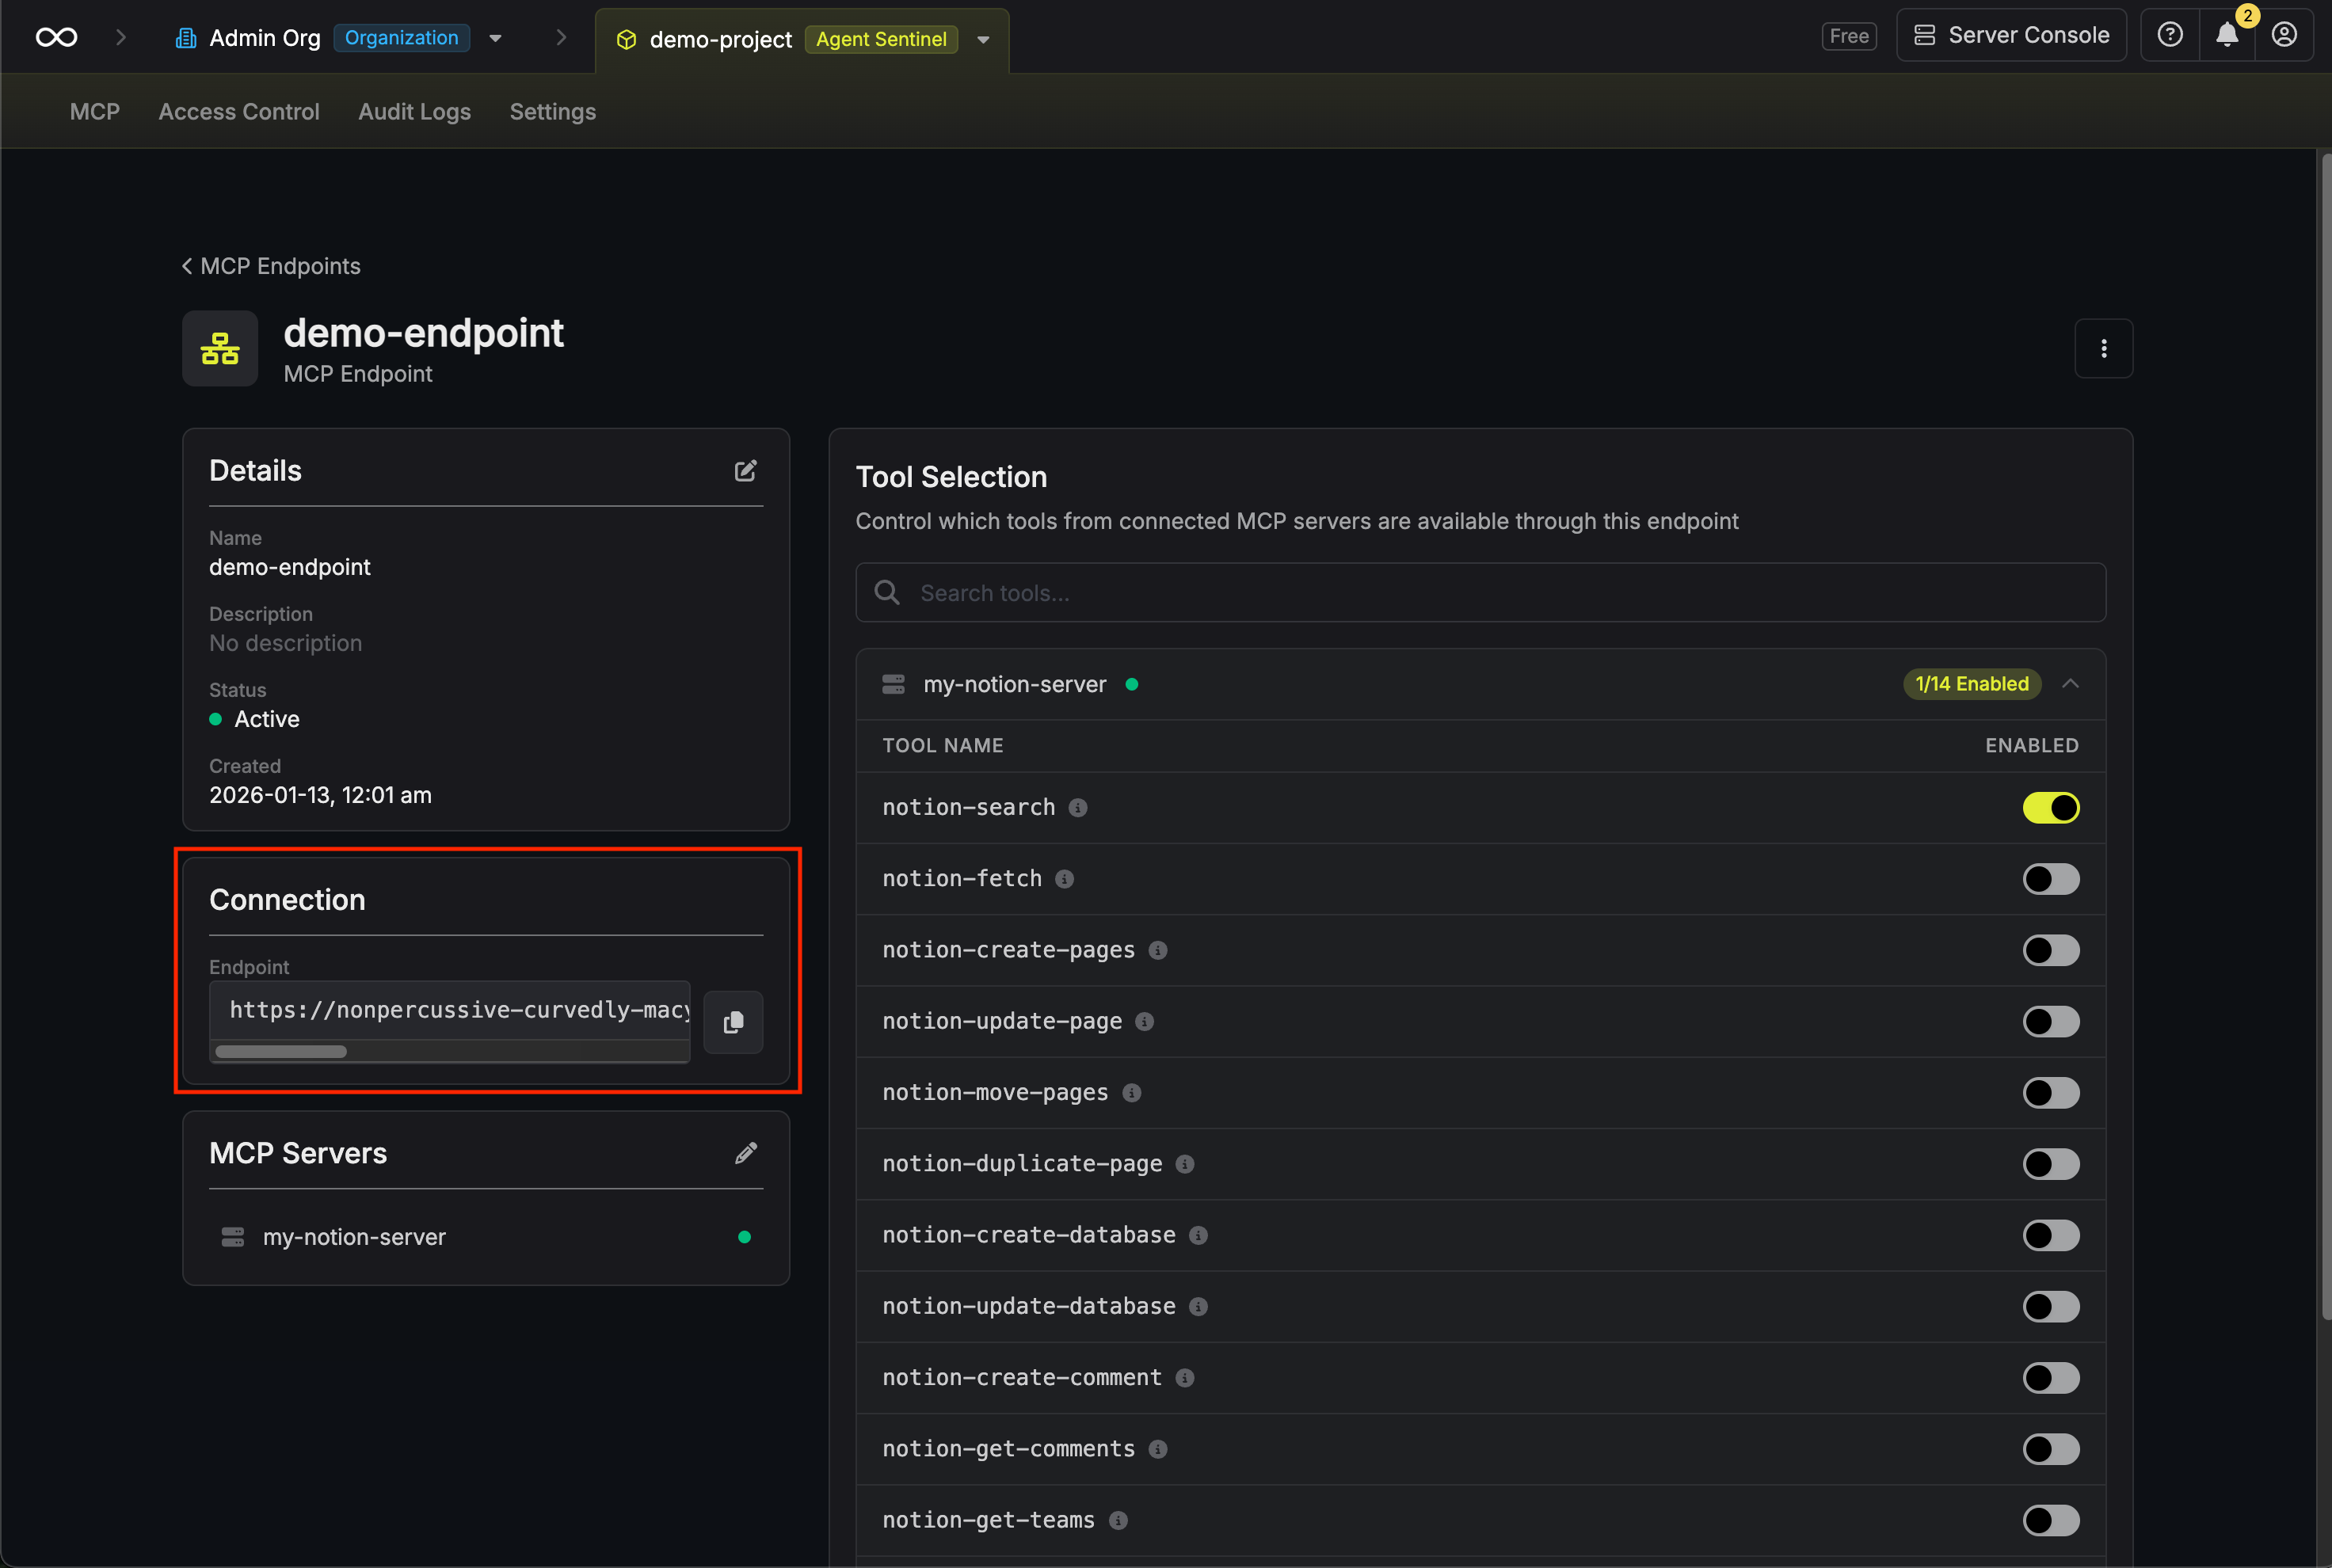
Configure tool selection
After creating the endpoint, you’ll be taken to the endpoint details page. Here you can configure which tools from each connected server are available through this endpoint.For each connected MCP server, you’ll see a list of available tools. Toggle tools on or off to control what AI clients can access.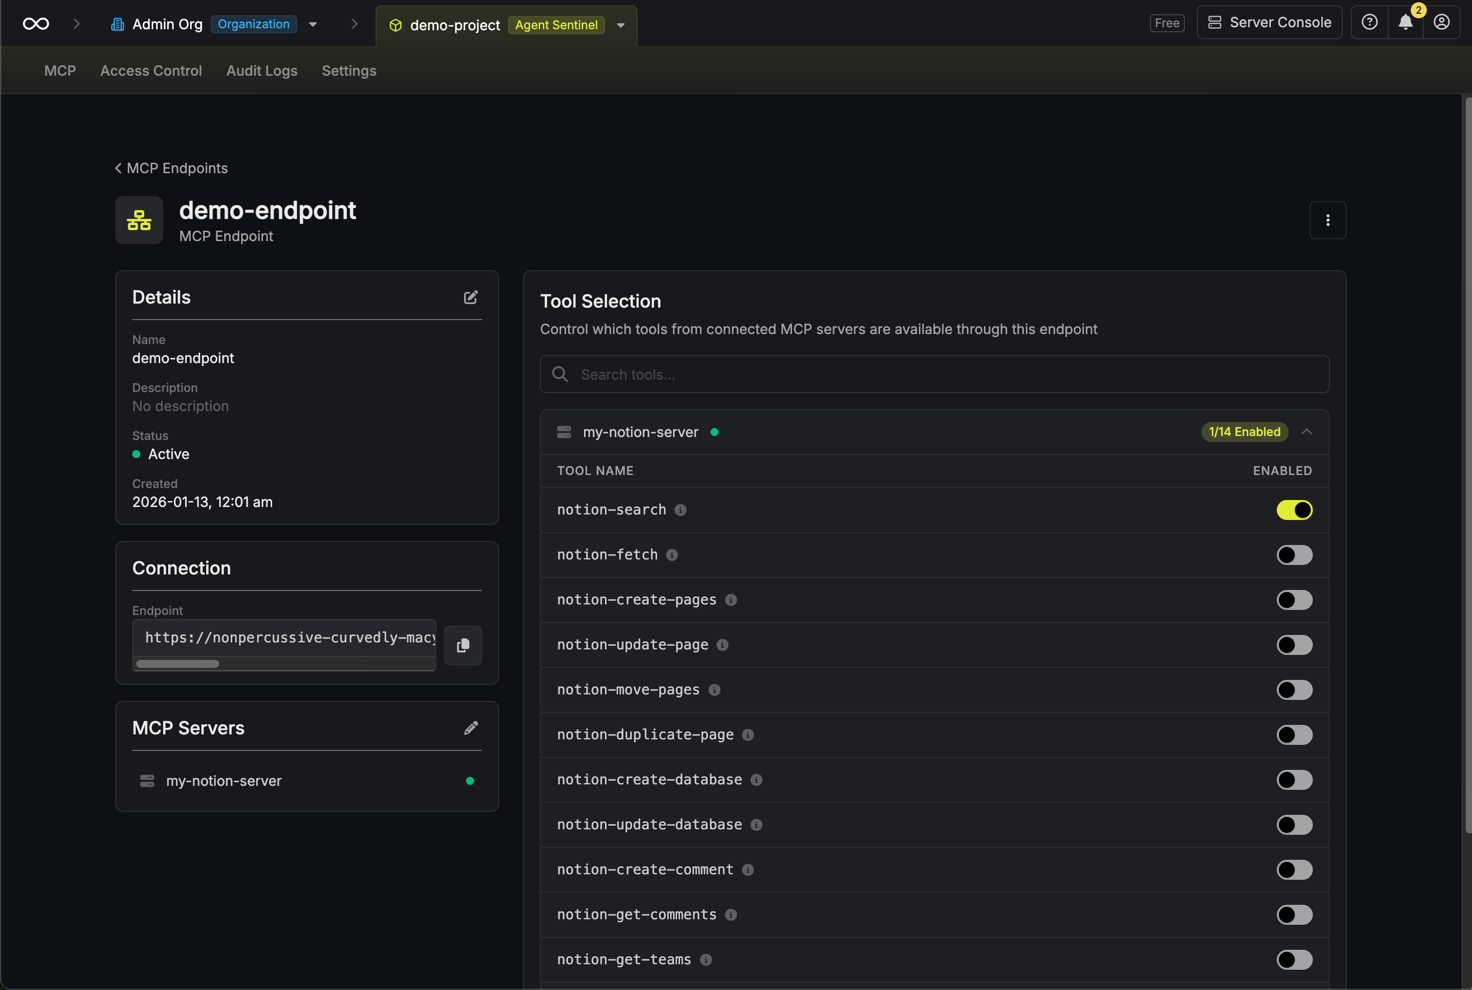
By default, no tools are enabled. You must explicitly enable the tools you want to make available.
Connecting AI Clients
Once you have your endpoint URL, you can connect AI clients to it.- Claude
- Other AI Clients
Add the endpoint to your Claude MCP configuration:
- Open Claude settings
- Navigate to the MCP section
- Add a new server with your Infisical endpoint URL
- Click Connect
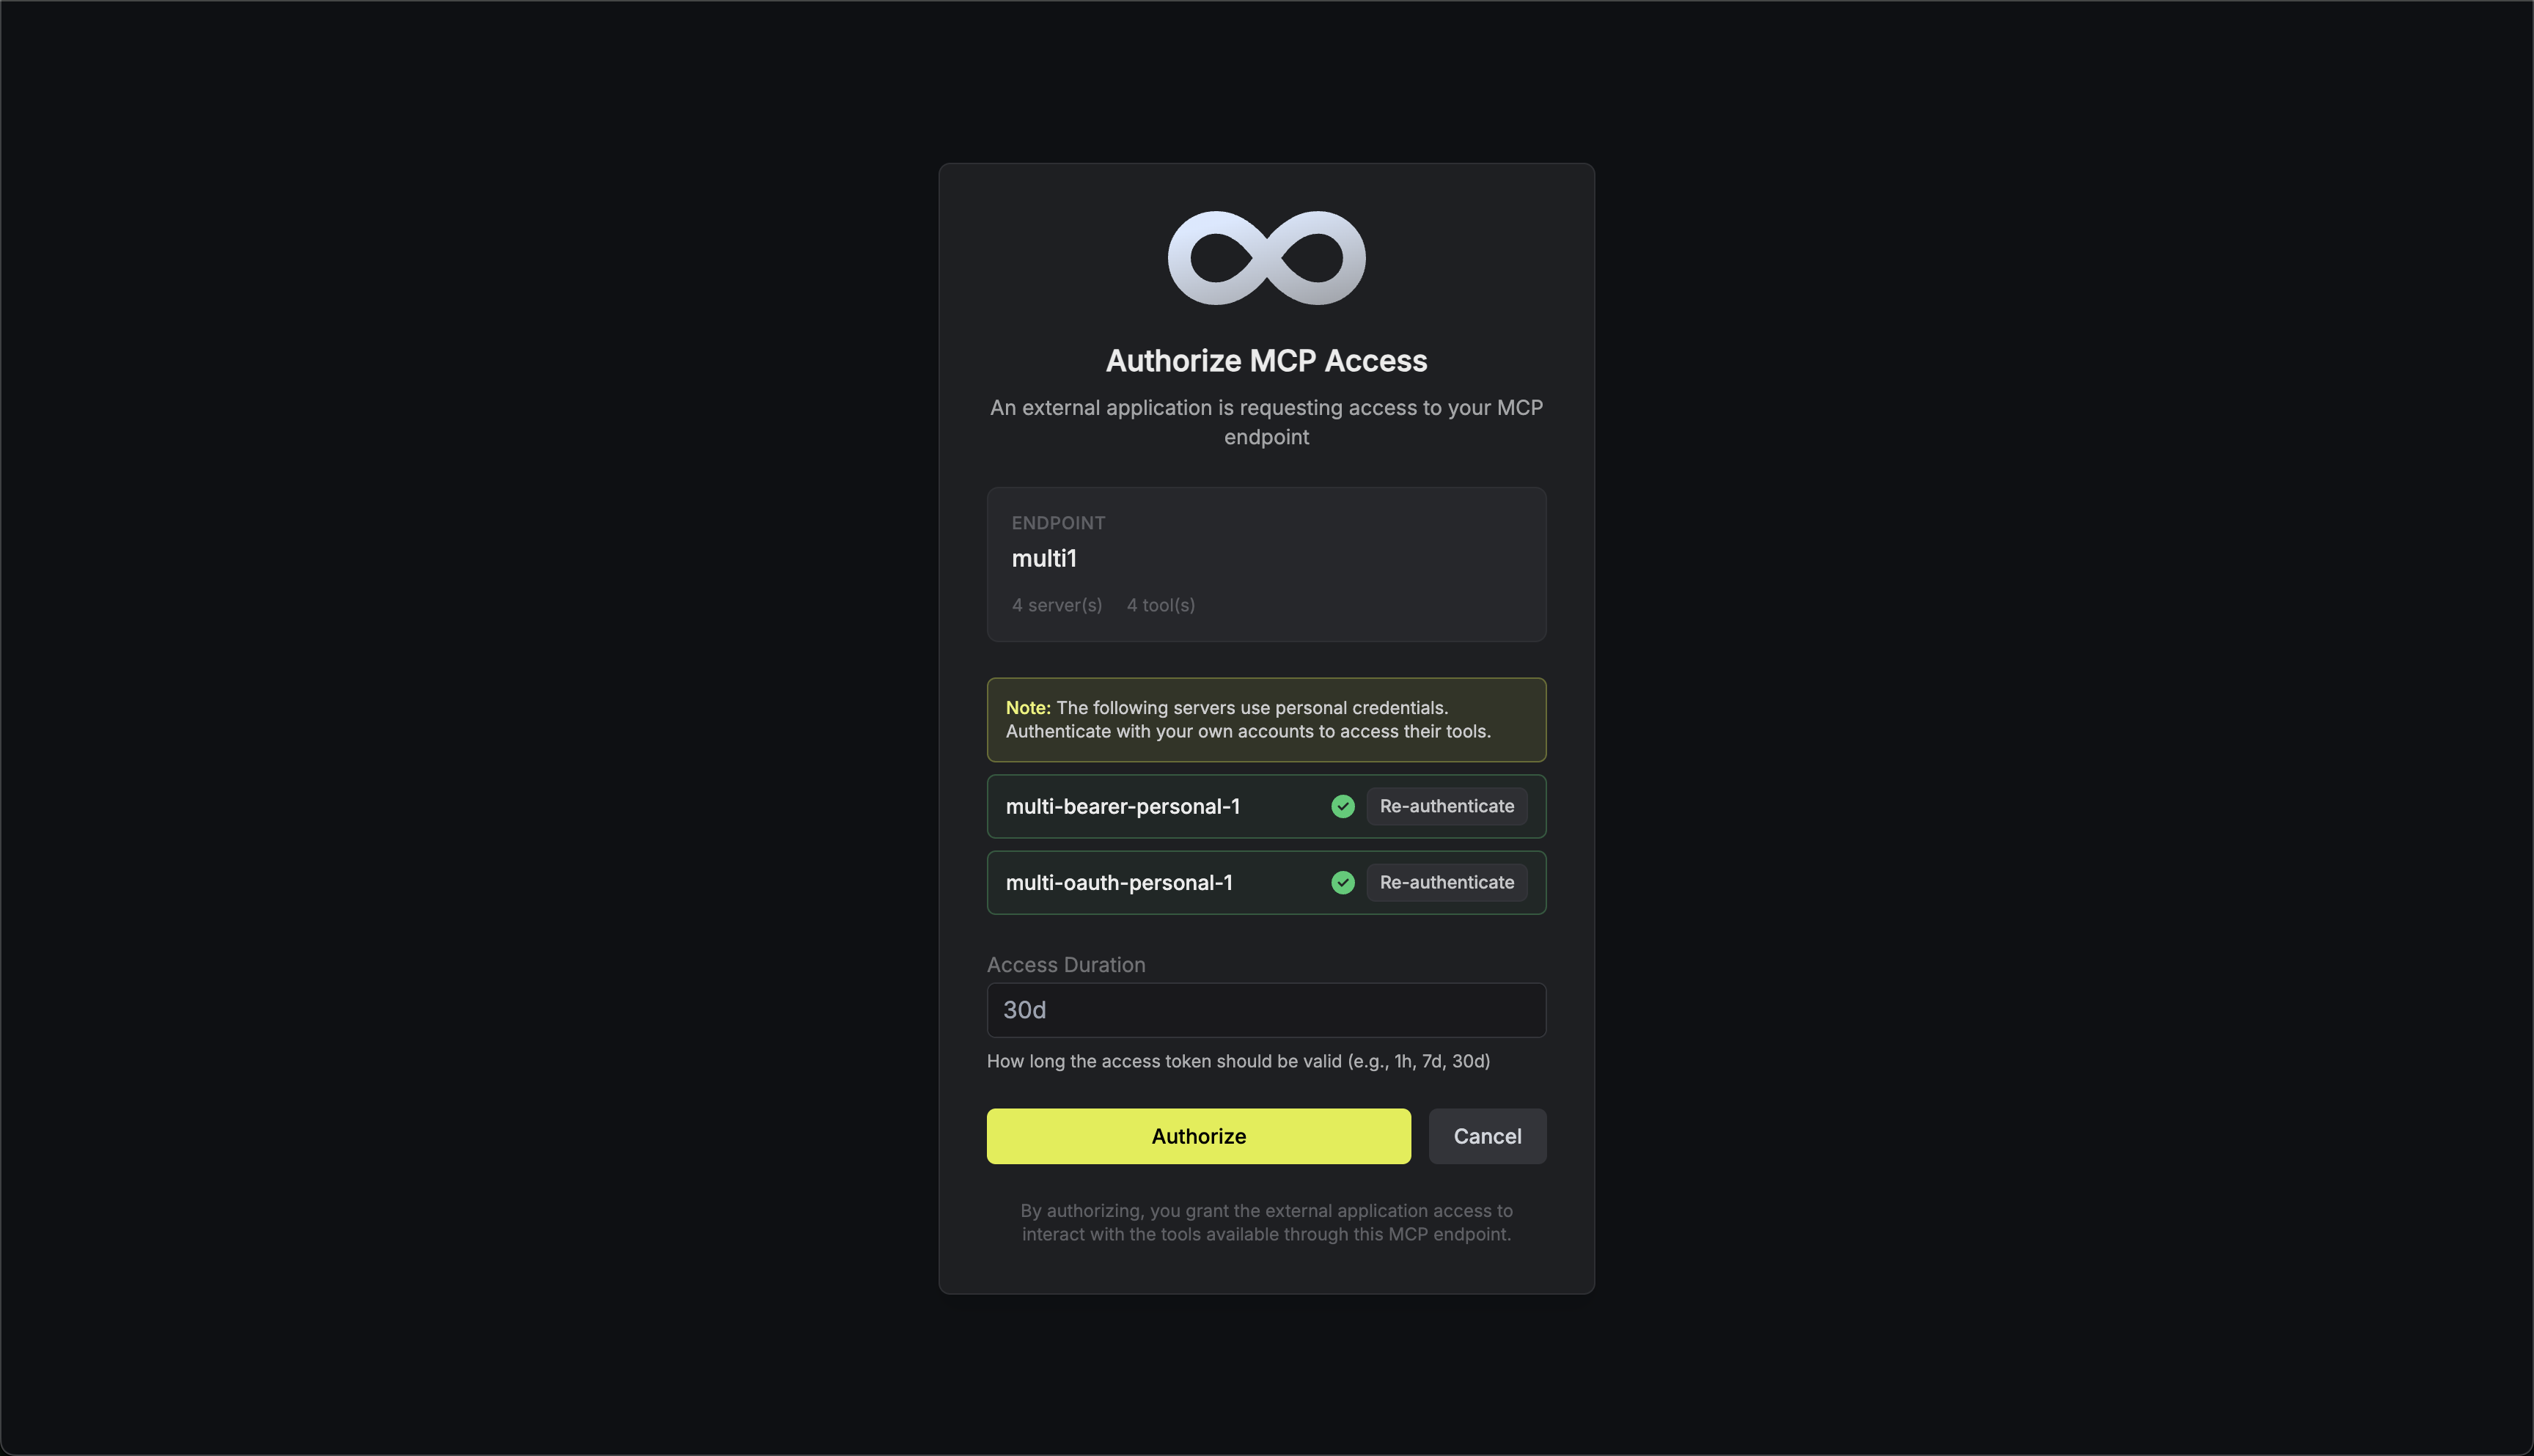
- Access Duration: How long the AI client can use the endpoint (e.g., 30 days)
Personal Credentials Authentication
When an MCP endpoint includes servers configured with Personal Credentials mode, users must authenticate with each of those servers before they can connect to the endpoint.Authentication Flow
When a user connects to an endpoint with servers requiring personal credentials:- Authentication Prompt: After authorizing access to the endpoint, users are shown a list of all MCP servers that require their personal credentials.
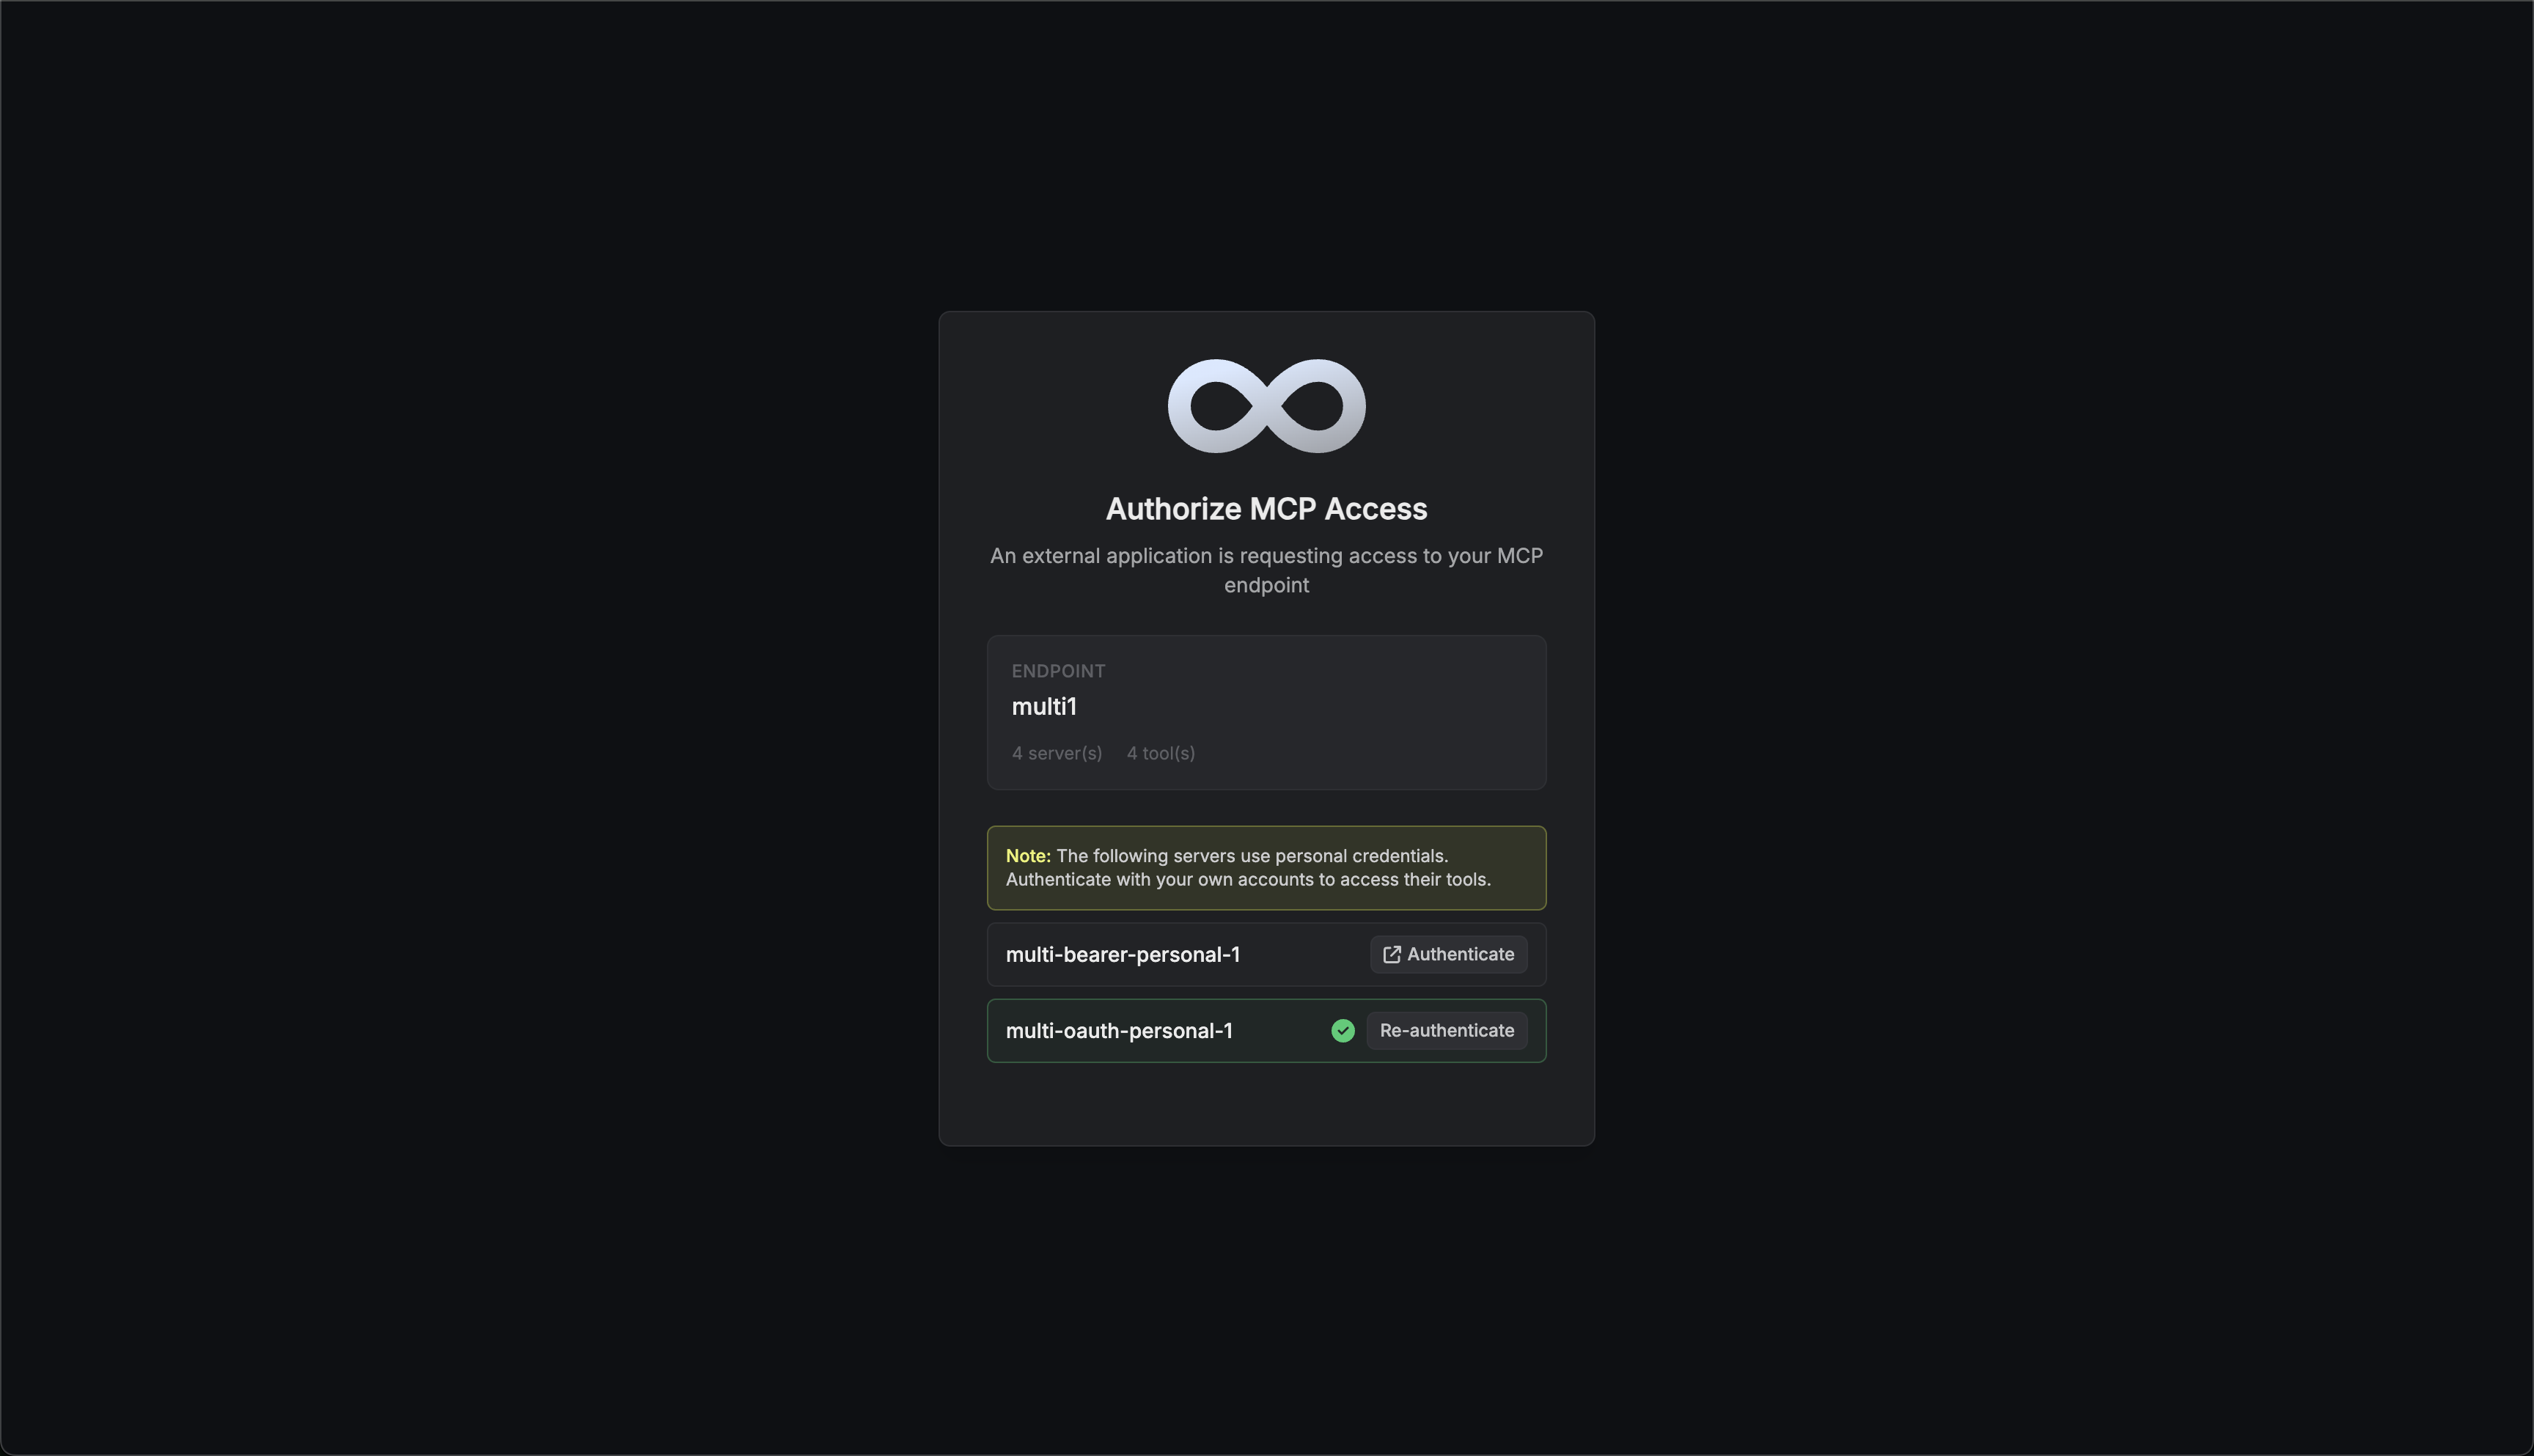
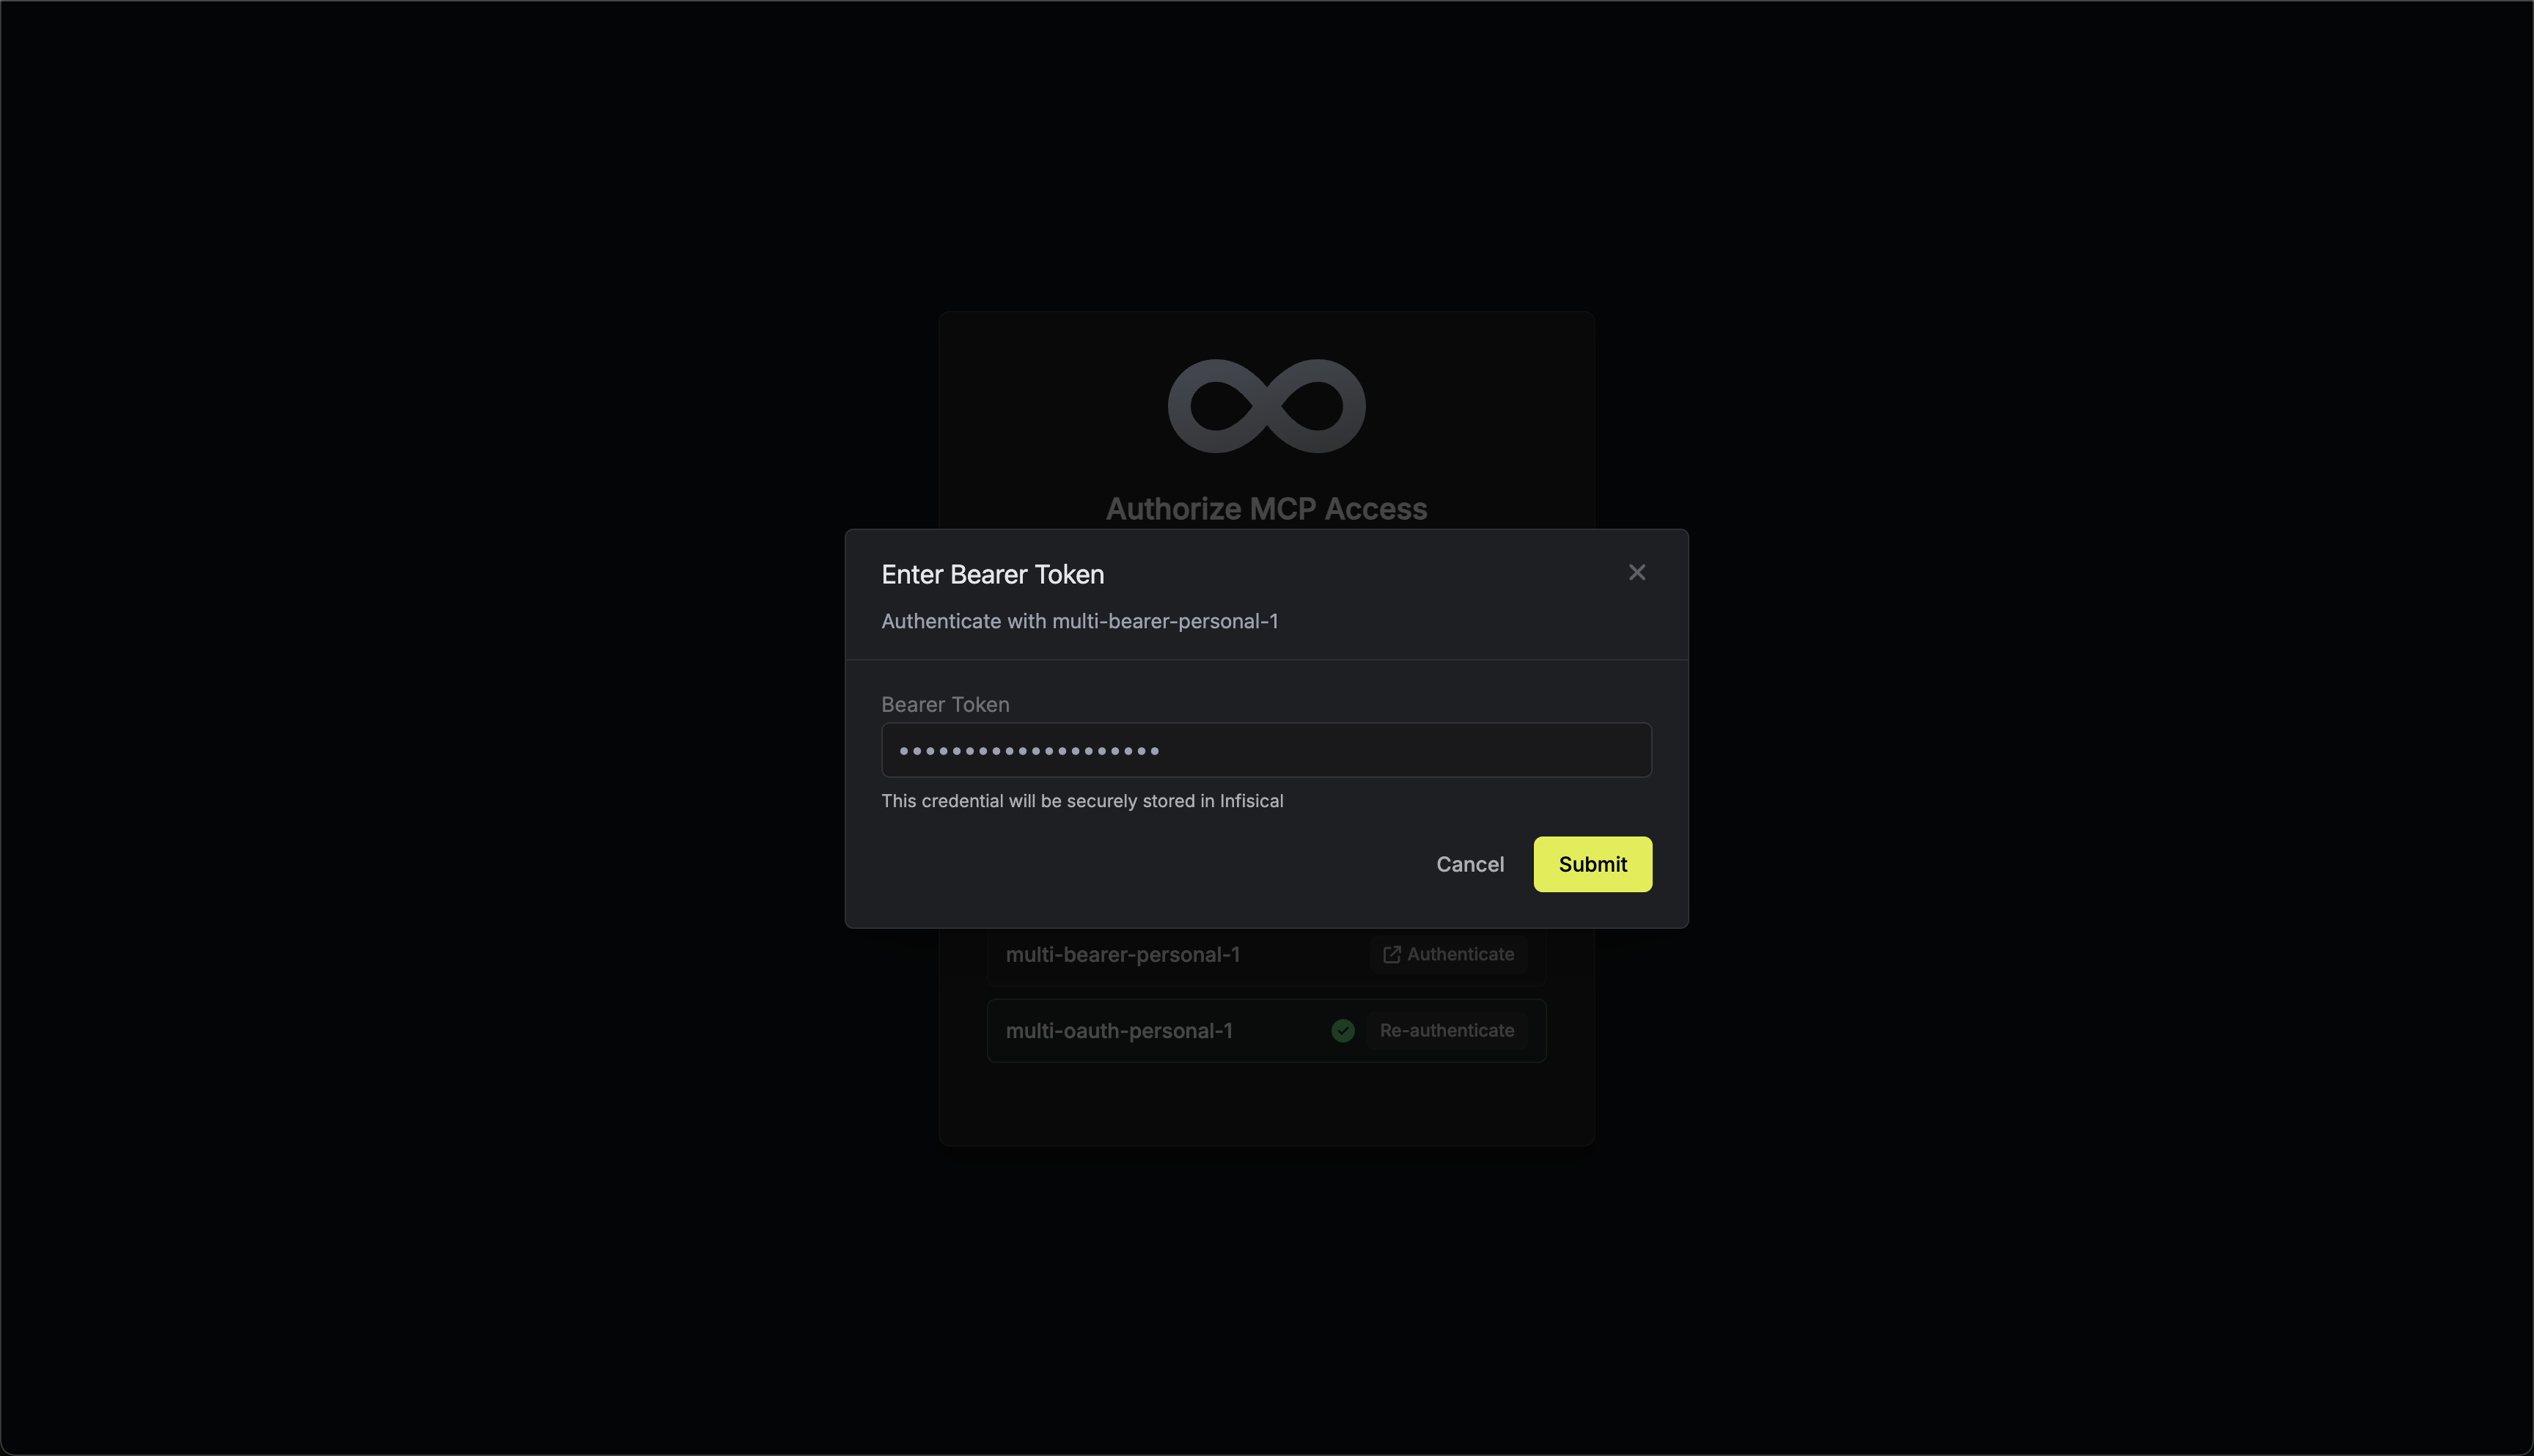
- Authenticate Each Server: Users must authenticate with each server in the list. The authentication method depends on how the server was configured:
- OAuth: Users are redirected to the service (e.g., GitHub, Notion) to authorize access
- Bearer Token: Users enter their personal access token directly
- Re-authentication: Users can update their credentials for servers they’ve already authenticated with by clicking the Re-authenticate button. This is useful when tokens expire or when users want to switch accounts.
- Complete All Authentications: Users must authenticate with all servers requiring personal credentials before they can proceed. The connection will only be established once all required authentications are complete.
Access Control with Permission Conditions
MCP endpoints support granular role-based access control through permission conditions. This allows you to restrict access to specific endpoints based on their name.Example Use Cases
- Team-specific endpoints: Create a role that only allows access to endpoints matching
engineering-* - Environment separation: Restrict production endpoints (
prod-*) to senior team members
Configuring Permission Conditions
When creating or editing a project role, you can add conditions to MCP endpoint permissions:- Navigate to Access Control > Roles
- Edit or create a role
- Under MCP Endpoints permissions, click Add Condition
- Select the Endpoint Name property
- Choose an operator (
equal,not equal,glob match, orin) - Enter the value(s) to match
Supported Operators
| Operator | Description | Example |
|---|---|---|
equal | Exact match | engineering-tools |
not equal | Does not match | prod-endpoint |
glob match | Pattern matching | prod-*, *-internal |
in | Matches any in list | ["endpoint-1", "endpoint-2"] |
PII Filtering
MCP Endpoints support automatic PII (Personally Identifiable Information) filtering to redact sensitive data from requests sent to MCP servers and responses returned to AI clients. This helps maintain compliance and prevent accidental exposure of sensitive information through AI tool interactions.Supported PII Types
| Type | Description | Redacted As |
|---|---|---|
| Email addresses | [REDACTED_EMAIL] | |
| Phone | Phone numbers (US format) | [REDACTED_PHONE] |
| SSN | Social Security Numbers | [REDACTED_SSN] |
| Credit Card | Credit card numbers | [REDACTED_CREDIT_CARD] |
| IP Address | IPv4 and IPv6 addresses | [REDACTED_IP] |
Configuring PII Filters
- Infisical UI
Navigate to Endpoint Details
Open your MCP endpoint and locate the Filters section in the left column.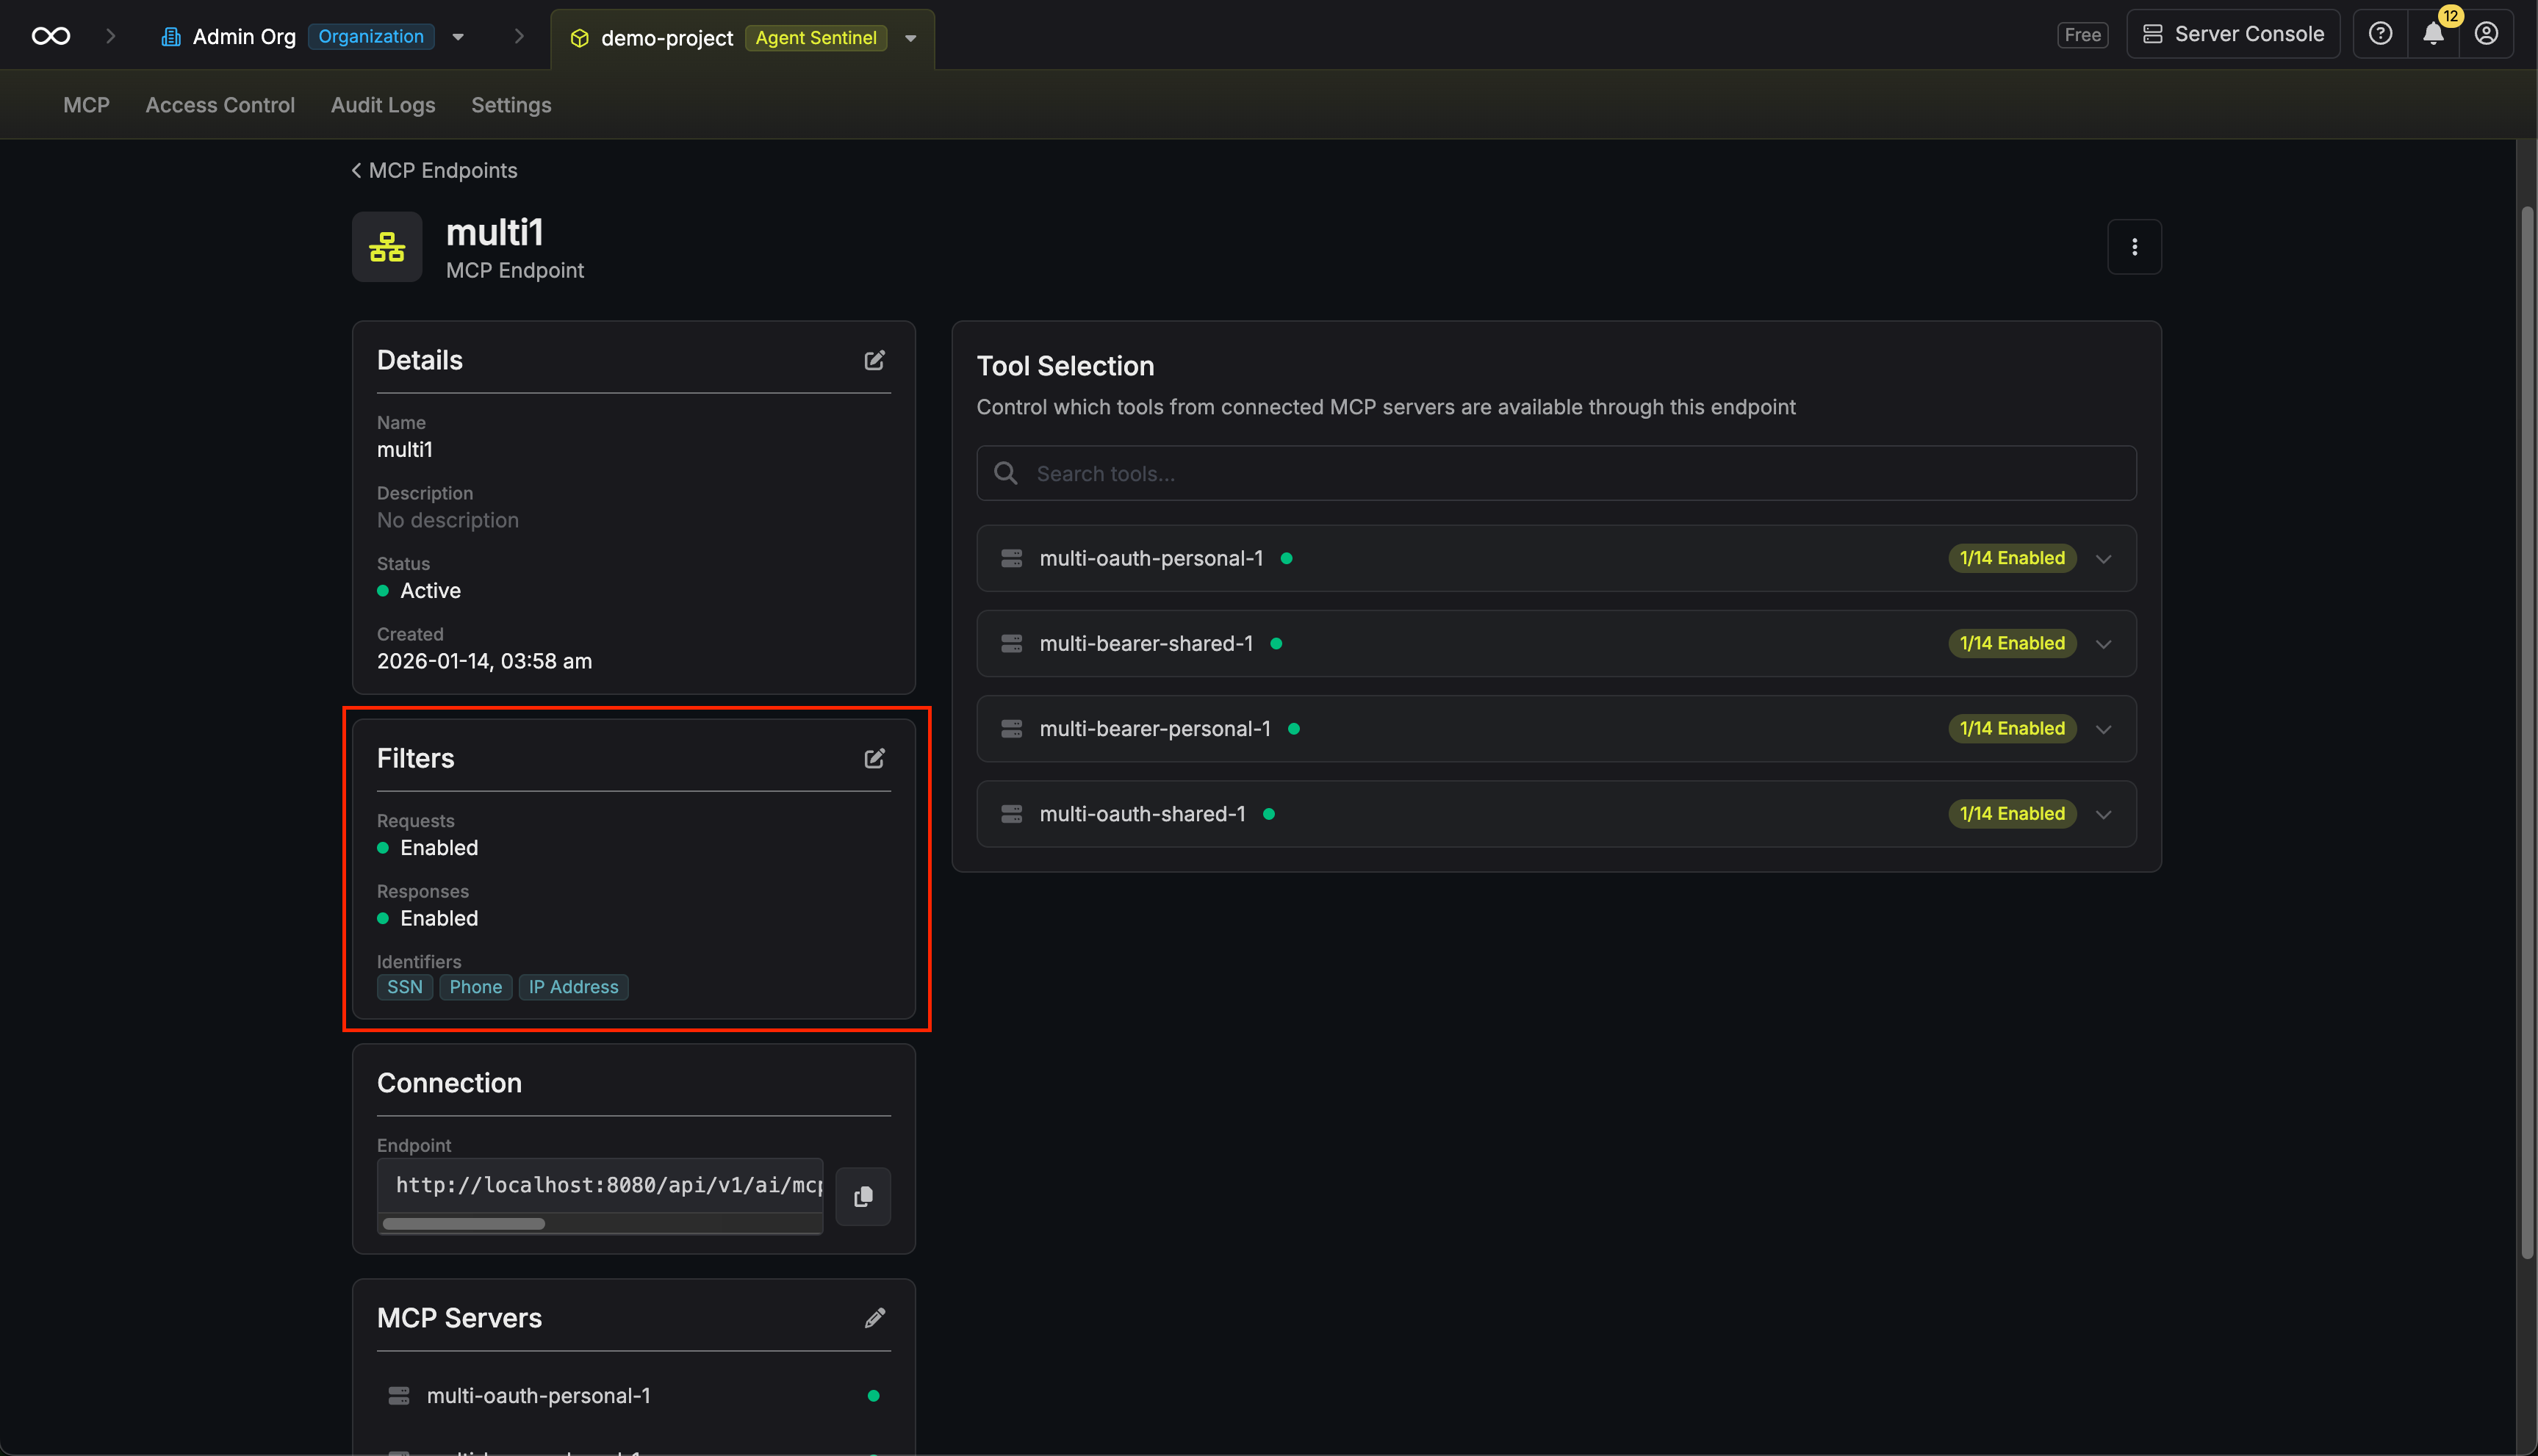
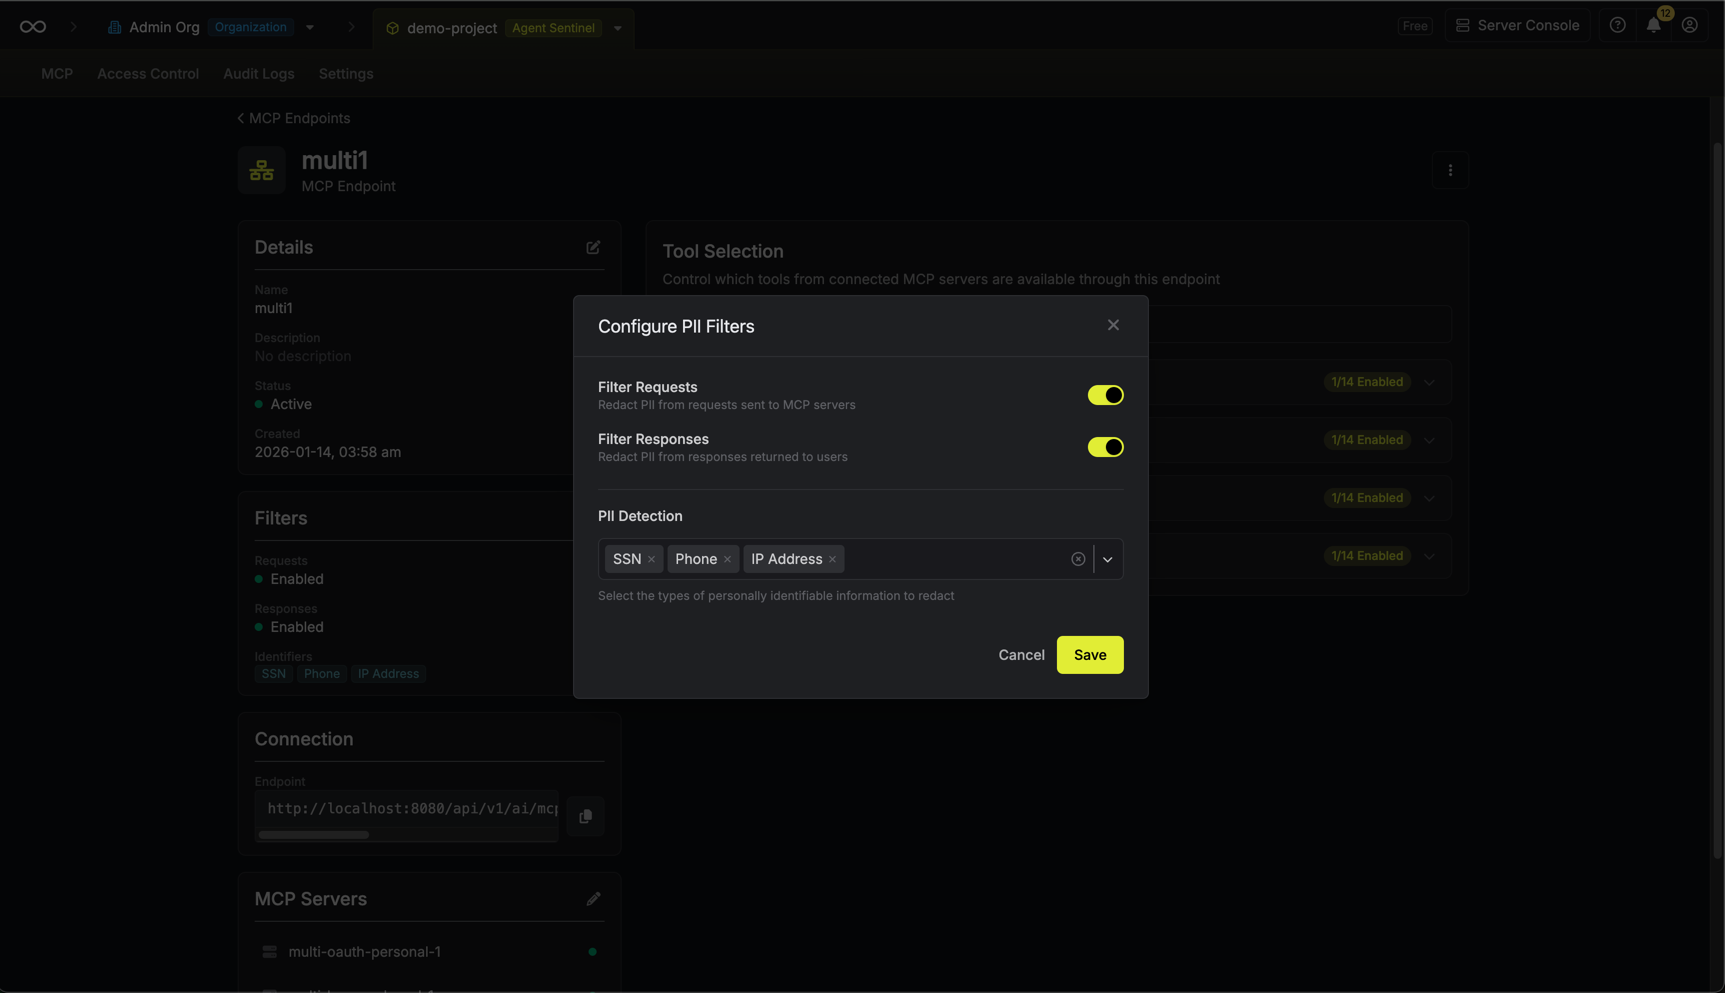
Configure Filtering Options
Configure the following options:
- Filter Requests: Enable to redact PII from requests sent to MCP servers
- Filter Responses: Enable to redact PII from responses returned to AI clients
- PII Detection: Select which types of PII to detect and redact
FAQ
How does PII filtering work?
How does PII filtering work?
When PII filtering is enabled, Infisical scans request and/or response payloads using pattern matching to detect sensitive data. Detected PII is replaced with redaction placeholders (e.g.,
[REDACTED_EMAIL]) before the data is passed through. The original data is never stored or logged when filtering is enabled.Can I filter requests and responses separately?
Can I filter requests and responses separately?
Yes, you can enable PII filtering independently for requests (data sent to MCP servers) and responses (data returned to AI clients). This gives you granular control over where redaction is applied.
What PII types are supported?
What PII types are supported?
Infisical currently supports detection and redaction of: email addresses, phone numbers (US format), Social Security Numbers, credit card numbers, and IP addresses (both IPv4 and IPv6).
Can I select different PII types for requests and responses?
Can I select different PII types for requests and responses?
No. The selected PII types apply to both request and response filtering. If you need different filtering rules, consider creating separate endpoints.
Can I connect the same MCP server to multiple endpoints?
Can I connect the same MCP server to multiple endpoints?
Yes, you can connect an MCP server to as many endpoints as needed. Each endpoint can have different tools enabled, allowing you to create different access profiles.
What happens when I disable a tool?
What happens when I disable a tool?
When you disable a tool, AI clients connected to the endpoint will no longer be able to use it. The tool won’t appear in the client’s available tools list.
How long does endpoint authorization last?
How long does endpoint authorization last?
Can I revoke an AI client's access?
Can I revoke an AI client's access?
Yes, you can revoke access by managing authorized sessions in the endpoint settings. This immediately disconnects the AI client.
What if an MCP server requires personal credentials?
What if an MCP server requires personal credentials?
If a connected MCP server uses personal credentials, users will be prompted to authenticate when they first connect to the endpoint. The authentication method depends on how the server was configured:
- OAuth servers: Users complete an OAuth authorization flow
- Bearer Token servers: Users enter their personal access token directly